
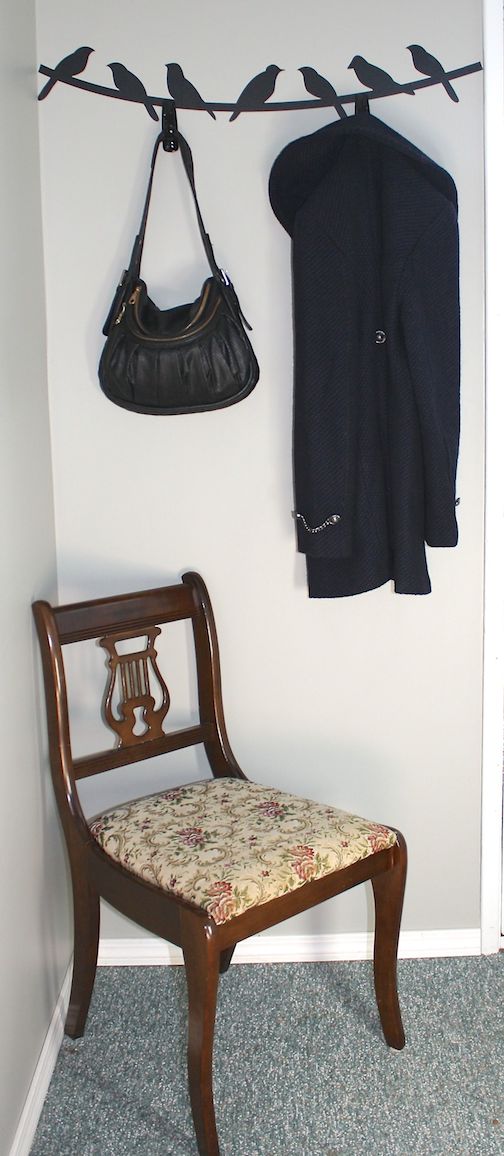
My feature project for today is a coat rack. Simple, inexpensive and unique, this coat rack was whipped up in less than an hour.
Materials:
1. Silhouette Brand Adhesive Vinyl
2. Silhouette Brand Transfer Paper
2. 3M Command Strip Hooks (max. 5 lbs)
3. Silhouette CAMEO
4. Birds on a Wire by Alaa’K #17151 in the Silhouette Online Store
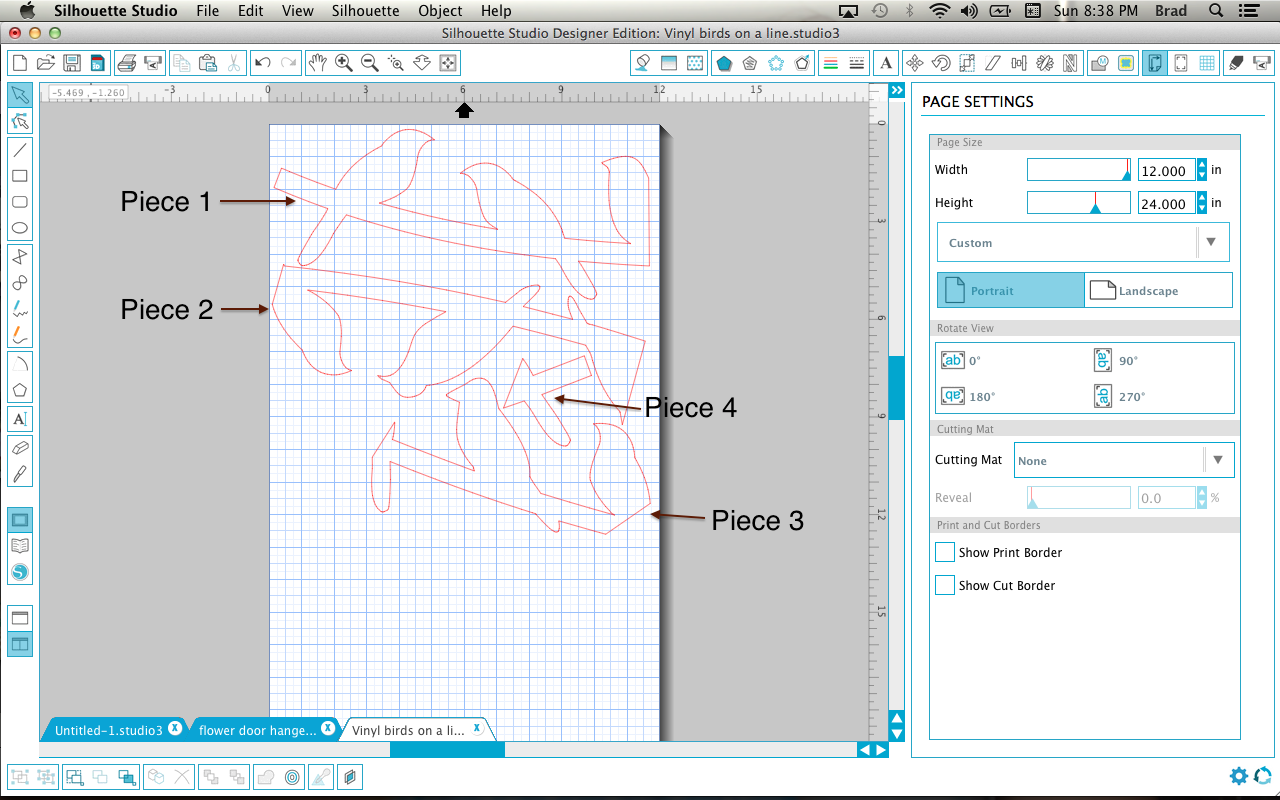
To begin, measure the width of the wall where the coat rack will be located. Now in Silhouette Studio, open Birds on a Wire Design ID #17151. Increase the size of the shape to the width of the wall. In order to utilize as much vinyl as possible, I decided to cut the shape into 4 parts. This created very little waste of vinyl, but it was a bit tricky to accurately place and join the shape together. This being said, the join lines are hardly, if at all, noticeable.
It is not necessary to cut the shape into pieces though. The cutting mat will not be used for adhesive vinyl, so as long as the shape is no wider than 12″ (or 9″ if you are using a PORTRAIT), you may cut the shape in its entirety.
The image below shows how I divided the shape to save as much vinyl as possible.
The next step is to adjust the Cut Settings. Select Vinyl-Silhouette Brand under Material Type. Note that you will have to adjust the blade to 2. You will also have to adjust the CAMEO rollers to the 12″ marking. Now load the vinyl into the Silhouette CAMEO making sure to change the load settings to Load Media (as opposed to Load Cutting Mat). I found this video on YouTube helpful with getting everything ready for cutting vinyl.
Now that the Birds on a Wire is cut, weed away the excess vinyl. Place transfer paper on top of the shape as this really makes placing the image onto the wall uncomplicated. It is doable without transfer paper but it is difficult to peel the shape off the vinyl backing and get it onto the wall without the shape sticking onto itself and making a mess of the project. I learned the hard way!
It is also a good idea to measure and mark points where the shape is to begin and end. This is a difficult one to eyeball because of the bend in the line.
Once the Birds on a Line is adhered to the wall, add 3M Command Strip Hooks. I could only find white hooks, so I had to paint mine black. You could also use hooks that screw into the wall. I decided to use Command Strip Hooks for my coat rack because it is on an outside wall. If I used screws, it would tear the vapour barrier. Also, this application is not permanent. I can take it down tomorrow and no one would be any the wiser there was something there. No holes and no paint chips.
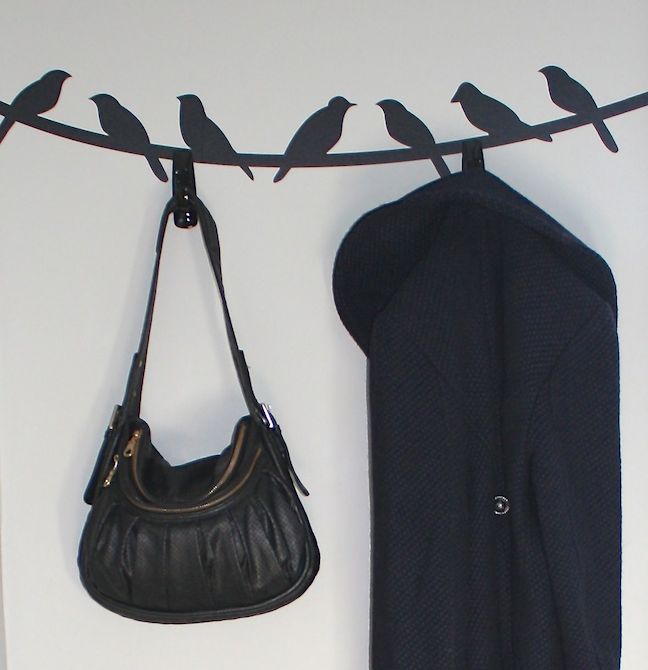
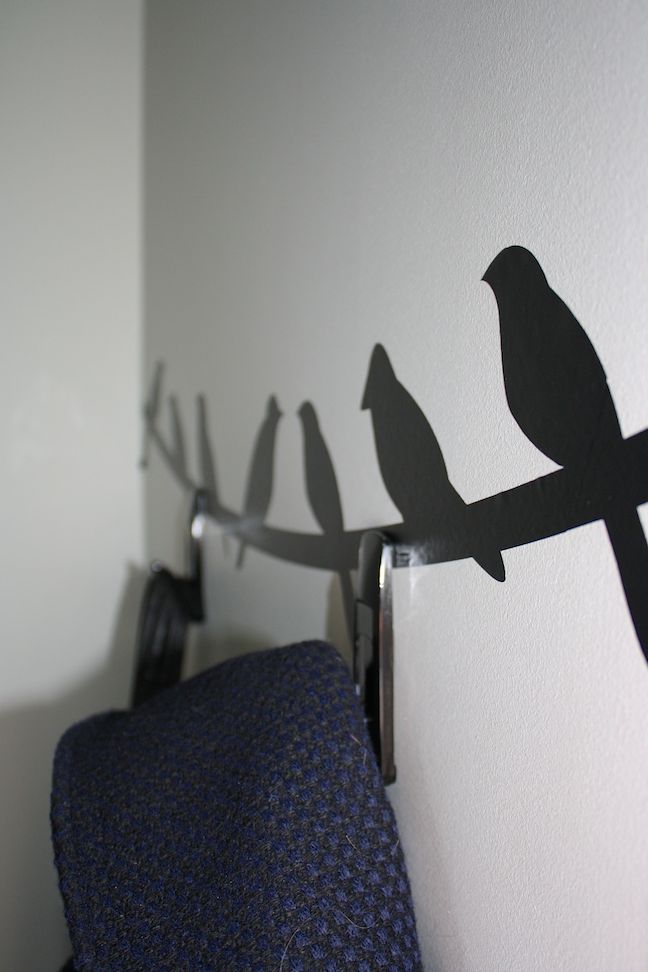
Here are a couple of close up pictures:
Take care and have a great week!
Martha

Such a great project! so smart to use vinyl and the 3M hooks. Totally perfect for renters and dorms, too.
Excellent point! This would be great for dorms and renters. I might have to edit this post to include that. Thanks!
Absolutely adorable! Pinning to share!
Thank you!
What a great idea!
Thanks!