Check out my latest post on the Silhouette America Blog! It’s a giant giraffe growth chart.

Have a great day!


Check out my latest post on the Silhouette America Blog! It’s a giant giraffe growth chart.
Have a great day!

Hello! Today I have a interesting Silhouette project to share with you. This set of coasters was a lot of fun to make. I used the shape Antique Demask to create this interesting coaster “puzzle”. I copied the shape twice and then divided each shape into 4 equal parts using the knife tool. Then, I cut the shapes onto card stock and used mod podge to seal the coasters. If I were to do this project again, I would use vinyl. This would be much less labour intensive!
I think the coasters looks beautiful on their own but once the “puzzle” is placed together, the look of the coasters are transformed. This was the perfect shape for this type of project.
This set of coasters would make an excellent Christmas gift or hostess gift.
Thanks for checking out my post today!
Martha
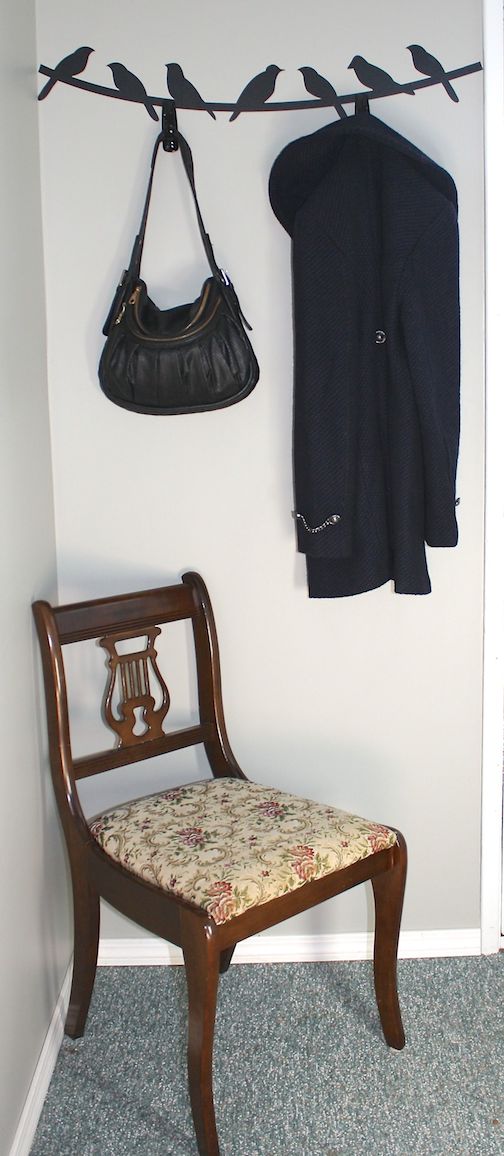
My feature project for today is a coat rack. Simple, inexpensive and unique, this coat rack was whipped up in less than an hour.
Materials:
1. Silhouette Brand Adhesive Vinyl
2. Silhouette Brand Transfer Paper
2. 3M Command Strip Hooks (max. 5 lbs)
3. Silhouette CAMEO
4. Birds on a Wire by Alaa’K #17151 in the Silhouette Online Store
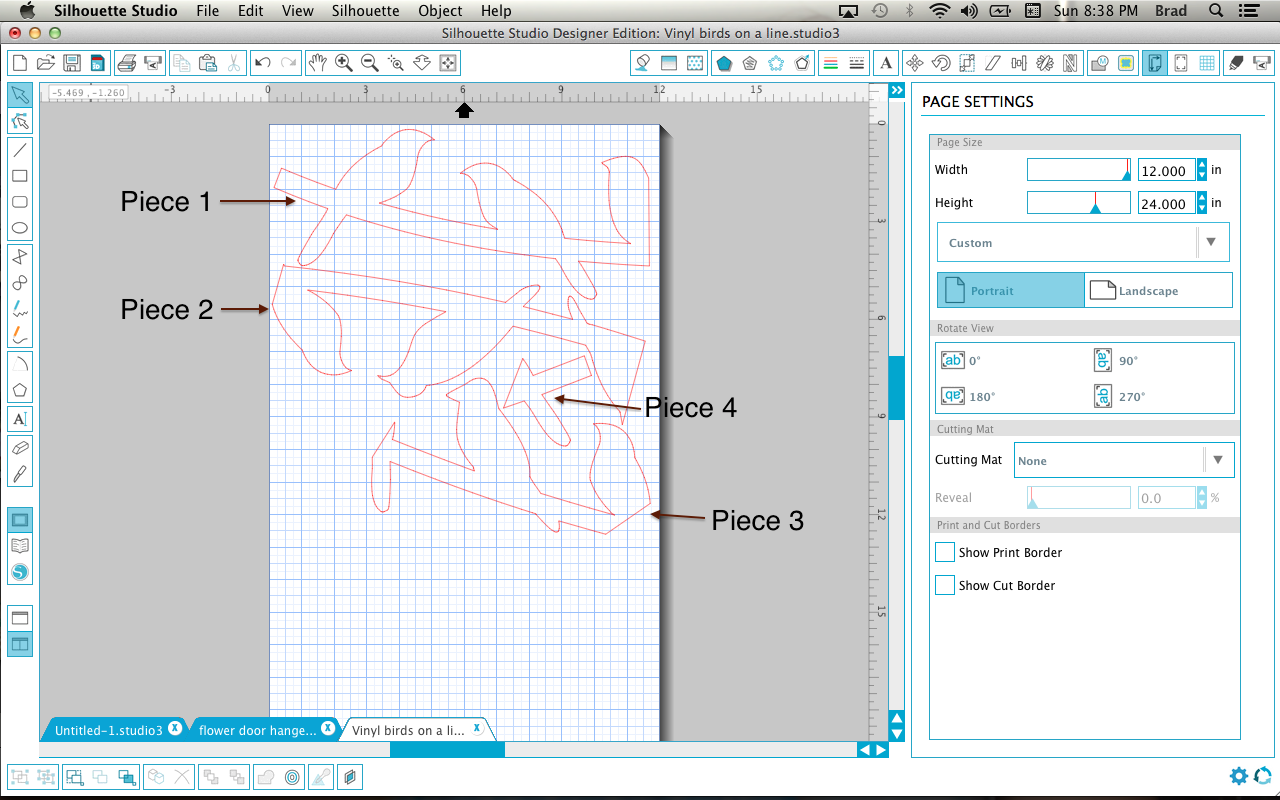
To begin, measure the width of the wall where the coat rack will be located. Now in Silhouette Studio, open Birds on a Wire Design ID #17151. Increase the size of the shape to the width of the wall. In order to utilize as much vinyl as possible, I decided to cut the shape into 4 parts. This created very little waste of vinyl, but it was a bit tricky to accurately place and join the shape together. This being said, the join lines are hardly, if at all, noticeable.
It is not necessary to cut the shape into pieces though. The cutting mat will not be used for adhesive vinyl, so as long as the shape is no wider than 12″ (or 9″ if you are using a PORTRAIT), you may cut the shape in its entirety.
The image below shows how I divided the shape to save as much vinyl as possible.
The next step is to adjust the Cut Settings. Select Vinyl-Silhouette Brand under Material Type. Note that you will have to adjust the blade to 2. You will also have to adjust the CAMEO rollers to the 12″ marking. Now load the vinyl into the Silhouette CAMEO making sure to change the load settings to Load Media (as opposed to Load Cutting Mat). I found this video on YouTube helpful with getting everything ready for cutting vinyl.
Now that the Birds on a Wire is cut, weed away the excess vinyl. Place transfer paper on top of the shape as this really makes placing the image onto the wall uncomplicated. It is doable without transfer paper but it is difficult to peel the shape off the vinyl backing and get it onto the wall without the shape sticking onto itself and making a mess of the project. I learned the hard way!
It is also a good idea to measure and mark points where the shape is to begin and end. This is a difficult one to eyeball because of the bend in the line.
Once the Birds on a Line is adhered to the wall, add 3M Command Strip Hooks. I could only find white hooks, so I had to paint mine black. You could also use hooks that screw into the wall. I decided to use Command Strip Hooks for my coat rack because it is on an outside wall. If I used screws, it would tear the vapour barrier. Also, this application is not permanent. I can take it down tomorrow and no one would be any the wiser there was something there. No holes and no paint chips.
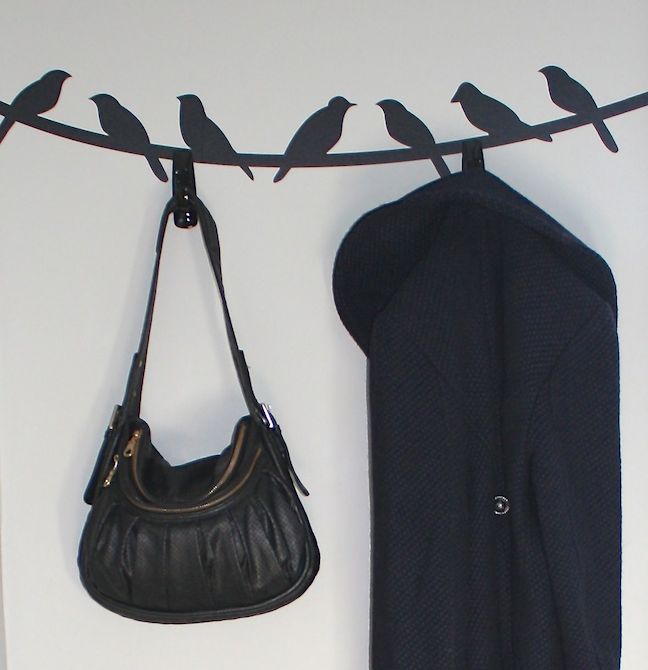
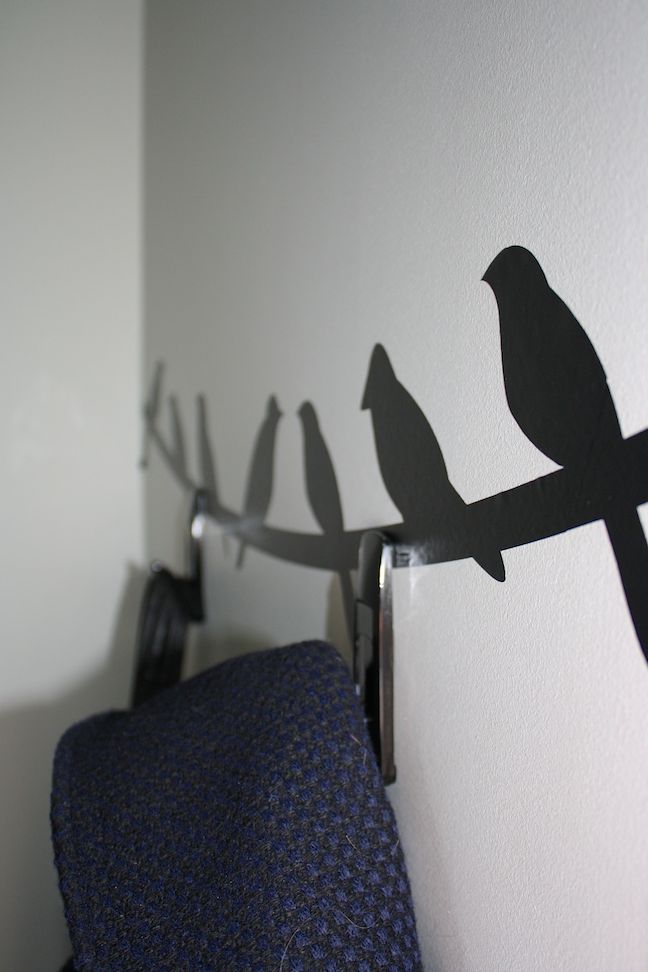
Here are a couple of close up pictures:
Take care and have a great week!
Martha
Hello and welcome to my new blog! This blog will be dedicated to creating unique projects using a Silhouette electronic cutting machine. I own the Silhouette Cameo but the Silhouette Portrait should work for most of the projects I will post. You will find projects for the home, party ideas, sewing projects, and crafts for kids.
Let’s get started! The first project I will share is this clock transformation.
BEFORE PICTURE:

AFTER PICTURE:

Materials:
1. Clock
2. Paint for clock frame
3. Spray Glue
4. Card stock
5. Adhesive card stock
6. Silhouette Cameo, cutting board, and spatula
I bought a $3.00 clock from the dollar store and took the face and hands off. This was a very simple procedure.

Next, measure the circumference of the circle and record the measurement. Be sure to find the EXACT measurement as your Silhouette cutter is extremely precise. You will want your new clock face to cover up the all of the original face. I like to use a sewing measuring tape so it can bend into the frame of the clock.

I then painted the clock frame a glossy black making sure to choose a paint that can adhere to plastic. I used an enamel paint. While the paint dried, I designed my new clock face in the Silhouette Studio software. Begin by drawing a circle using the Draw an Ellipse icon on the left side of the screen. Next, open the Scale Window and adjust the width and height of your clock face to the measurements you recorded earlier.

Find the middle of the circle and place a very small circle in that spot. I used the grid marks in Silhouette Studio to determine the center. For simplicity, I decided to put only the numbers 3, 6, 9, and 12 on my clock face. I thought it would look interesting to replace the 9 with a shape from the Silhouette Online Store. I chose Birds on a Branch #41338. Open the Replicate Window and Mirror Left the Birds on a Branch shape so that the branch appears to be growing from the center of the clock and out to the number 9. Delete the original image. I used the Baskerville font for the clock numbers with a text size of 180 pt.
Next, I wanted the Birds on a Branch shape to include the outline of the center hole of the clock. This way, there would not be extra bulky paper around the clock hands. Make a copy of the small middle circle, located in the center of the large clock face circle. Take this copy and place it at the end of the tree branch, as seen in the picture below. Then, open the Modify Window and then choose Subtract. What you will be left with is the Bird on a Branch with an indentation of middle small circle.

Move all numbers and the Birds on a Branch shape off of the cutting board, leaving just the face of the clock. Click the Send to Silhouette icon on the top left of screen. Adjust cut settings to accommodate your chosen media. I used a medium weight card stock that had a subtle print. Next, cut the birds and numbers from a contrasting colour. I used black adhesive-back card stock (pictured below).

The next step is to put the clock together making sure that your paint has thoroughly dried. I glued my clock face with spray adhesive. I find it has an excellent adhesive quality and does not give you a wet bubbled look on the other side of the paper. A little goes a long way.

After glueing the clock face, accurately place the numbers and Birds on a Branch shape on the front. Replace the hands on the clock, put the battery back in and voila, your clock is now complete!

Let me know if you found this tutorial useful. I would love for you to share your projects with me. I’m open to all feedback, both the good and the bad! Have fun creating 🙂
Until next week,
Martha
